Testing a solar panel with a multimeter is crucial for ensuring optimal performance. Understanding how to test a solar panel with a multimeter can save time and money. Many users may overlook this step, leading to decreased efficiency.
In this guide, we explore the top 10 methods for testing solar panels effectively. Each method is derived from practical experience, highlighting professional insights. These techniques not only assess the panel's functionality but also reveal common issues. By using a multimeter, you can measure voltage and current accurately. It’s vital to be familiar with your equipment before testing.
Solar panels are often subjected to environmental stressors. This can impact their performance significantly. Understanding how to interpret the data from your multimeter adds another layer of insight. Be prepared to face challenges during your tests. Misreading the multimeter can lead to incorrect conclusions about your solar system’s condition. Taking the time to learn how to test a solar panel with a multimeter helps you maintain your investment.
Understanding solar panels begins with the knowledge of their core components. Solar panels convert sunlight into electricity through photovoltaics. In 2023, the global solar energy market reached over $200 billion, showing its growing importance. A multimeter is essential for testing solar panel performance. This tool measures voltage, current, and resistance, providing crucial insights into the system's efficiency.
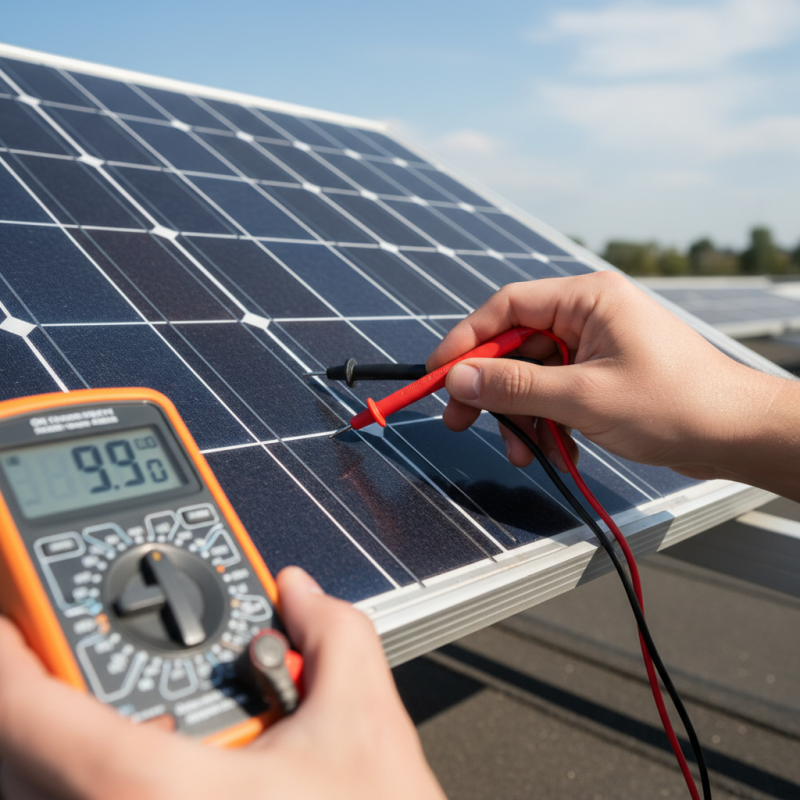
Using a multimeter effectively requires an understanding of its settings. For instance, measuring voltage means setting the meter to the DC voltage mode. This reflects the operating voltage of the solar panel under sunlight. The standard output usually ranges between 15 to 20 volts for residential panels. It's vital to double-check connections to avoid inaccurate readings. Sometimes, miscalibrations occur, leading to unreliable data.
When testing current, place the multimeter in-line. This step can be intimidating for beginners. Missteps can result in equipment damage or inaccurate measurements, raising the need for careful handling. Regular testing helps ensure optimal function. Data shows that poorly maintained panels can lose up to 25% of their efficiency over time. Understanding basic testing methods empowers users to maintain and optimize their solar energy systems effectively.
| Method | Description | Measurement Type | Expected Value |
|---|---|---|---|
| Open Circuit Voltage | Measure voltage without any load. | Voltage (V) | Above rated V |
| Short Circuit Current | Measure current when terminals are shorted. | Current (A) | Above rated A |
| Voltage under Load | Measure voltage when connected to a load. | Voltage (V) | Above 70% of rated V |
| Resistance Measurement of Panels | Check resistance of solar cells. | Resistance (Ω) | High resistance |
| Temperature Measurement | Measure the panel's surface temperature. | Temperature (°C) | Within operational range |
| Checking Junction Box Connections | Ensure connections are secure and correct. | N/A | All connections tight |
| Assessing Panel Output in Sunlight | Measure output while in direct sunlight. | Voltage and Current (V, A) | Rated output V and A |
| Monitoring Panel Efficiency | Compare output to input energy. | Efficiency (%) | Above 15% |
| Checking for Physical Damage | Visually inspect for cracks or other damage. | N/A | No visible damage |
| Calibration Check of Multimeter | Ensure multimeter is accurately calibrated. | N/A | Calibrated to standard |
: A multimeter is essential for measuring voltage, current, and resistance in solar panels.
A clamp meter measures current without breaking the circuit, enhancing operational efficiency testing.
It measures sunlight intensity, providing context for solar panel performance, especially under low light.
Faulty wiring can cause performance issues or safety risks, so they should be checked thoroughly.
Measure it when the panel is not under load; low readings may signal potential problems.
Always compare with manufacturer specifications; discrepancies indicate a need for further inspection.
Yes, improper tool handling may damage equipment or lead to incorrect readings.
Regular checks are vital to maintain efficiency and prolong the lifespan of solar panels.
If low, it may signal internal issues within the solar cells that need attention.
Correct interpretation helps determine the solar panel's health and ensures proper energy contribution.
This article delves into how to test a solar panel with a multimeter, providing a comprehensive understanding of solar panels and the essential role of multimeters in their evaluation. It begins by outlining the fundamental tools required for accurate testing, emphasizing the significance of measuring parameters crucial for solar panel performance.
The piece offers a step-by-step guide, detailing the process of measuring both the open circuit voltage and the short circuit current of solar panels. Furthermore, it helps readers interpret the test results effectively, ensuring they can gauge the performance and efficiency of their solar energy systems. By mastering these techniques, users can maintain optimal functionality of their solar panels and make informed decisions on their energy solutions.